
Configuring layout view
Shape the sell screen around how your counter actually works: reorder and colour your categories, resize the tiles for top sellers, and set which screen opens first.
Rather not read? Skip to the video walkthrough at the bottom of the page.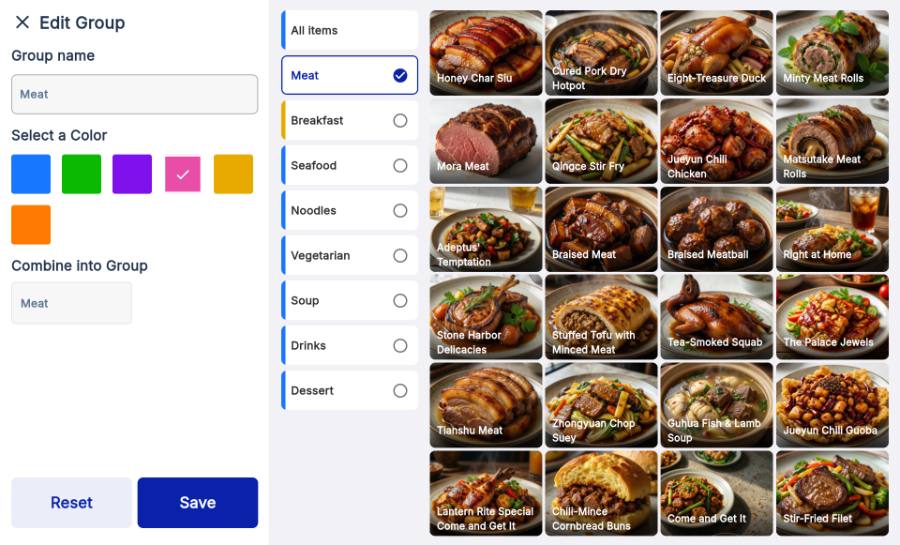
WHO THIS IS FOR
Managers tuning the counter
so the items staff ring up most often are the easiest ones to hit.
Anyone setting up a new device
— deciding which screen opens first and how many items fit per row.
BEFORE YOU BEGIN
Tablet and phone are configured separately. The tablet edits the item grid; the phone sets the default sell mode and density.
Your categories exist. There is nothing to reorder or colour until items and categories are in.
Nothing changes until you save. On the tablet, edits only apply once you tap the blue Save button.
THE STEPS
Pick the device in front of you.
Open layout settings
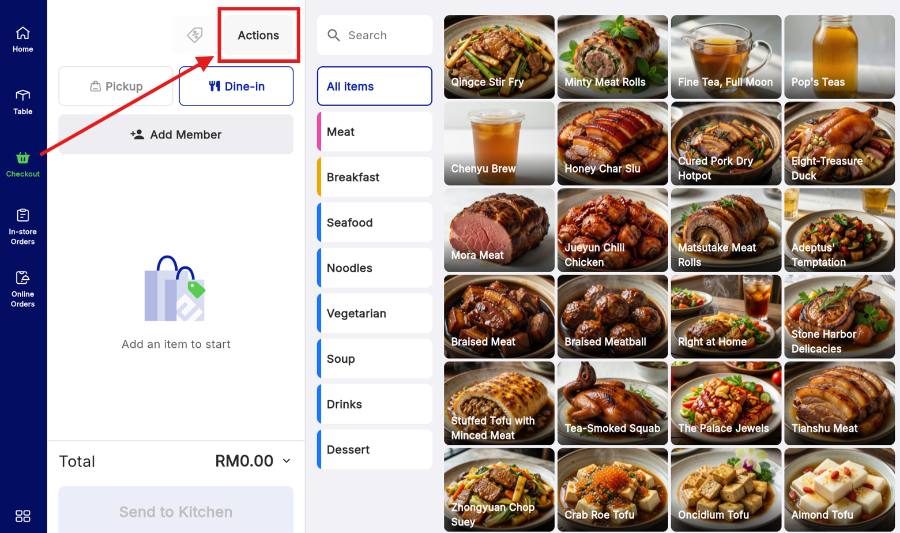
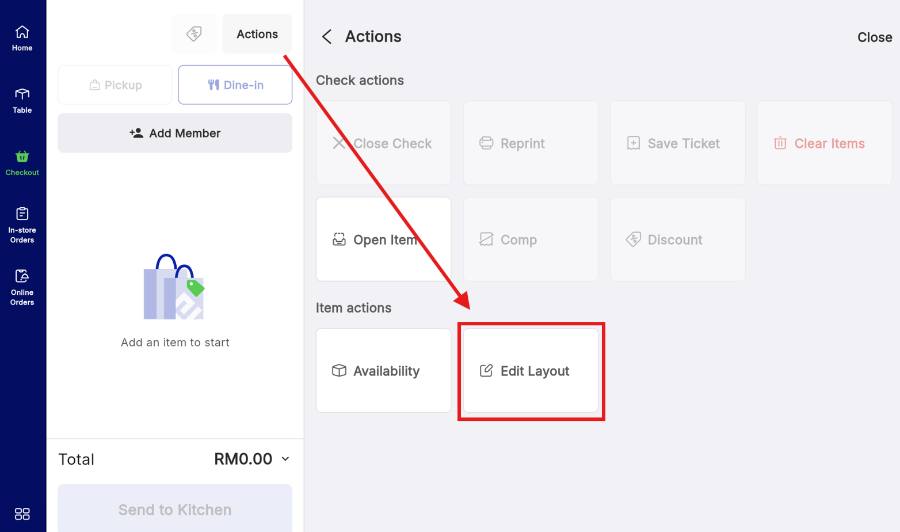
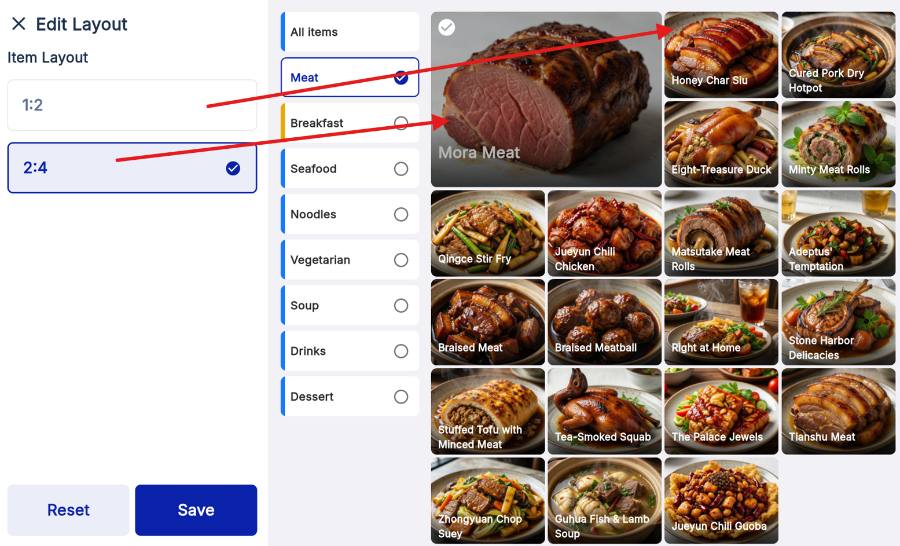
On the Checkout page, press Actions, then choose Edit Layout. The grid switches into edit mode.
Rearrange the grid
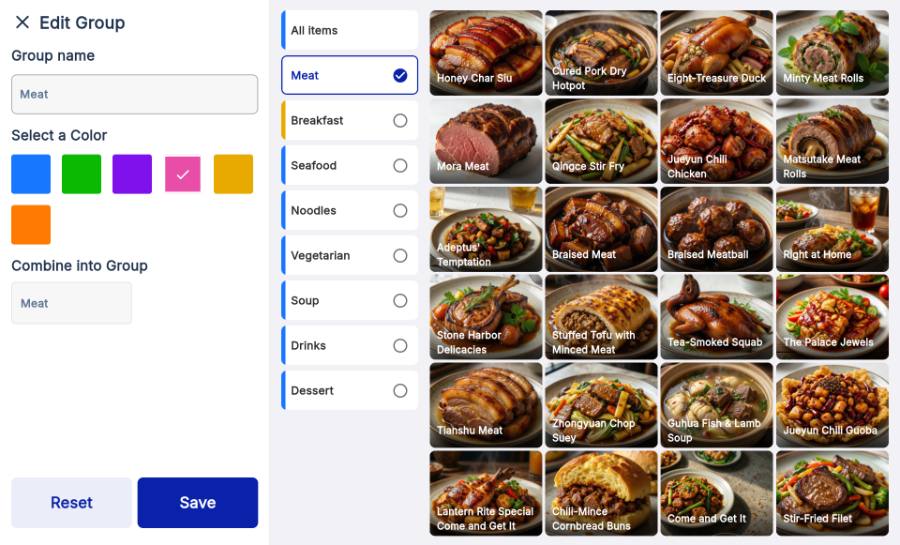
With Edit Group open, shape the grid four ways.
Save the layout
Pick the tile ratio under Item Layout — 1:2 or 2:4 — then press the blue Save button. Until you do, nothing is applied to the live sell screen. Reset puts the default grid back.
Open layout settings
Tap the More tab at the bottom right, scroll down to Settings, then tap Layout.

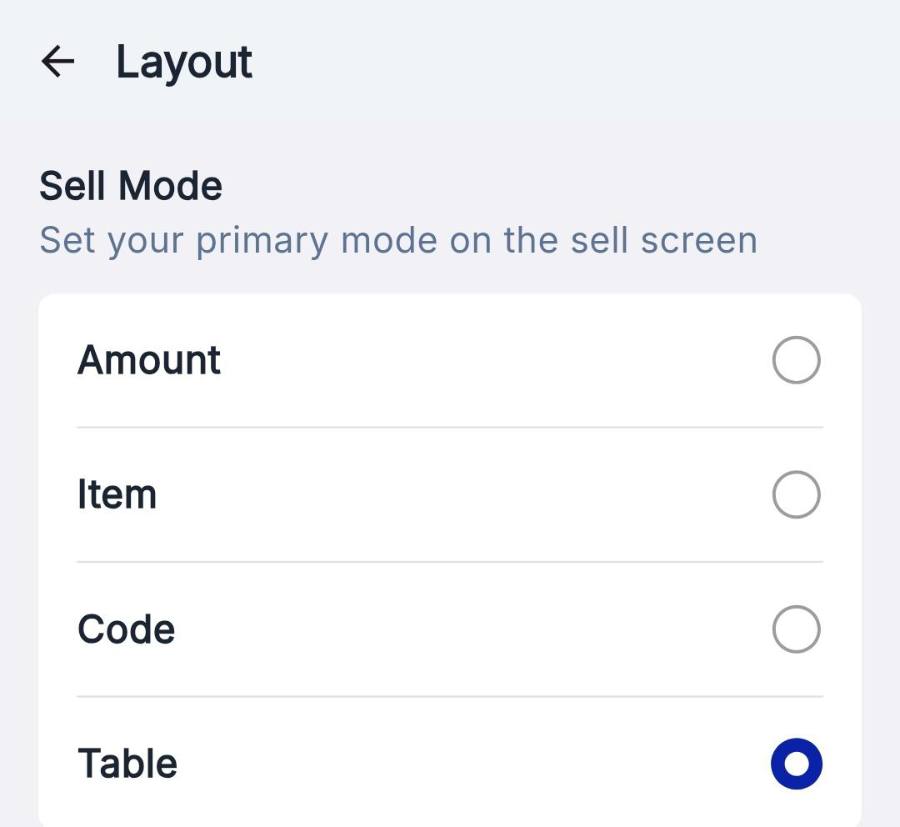
Choose your sell mode
Sell Mode decides which screen opens the moment staff tap Sell.
Set grid density
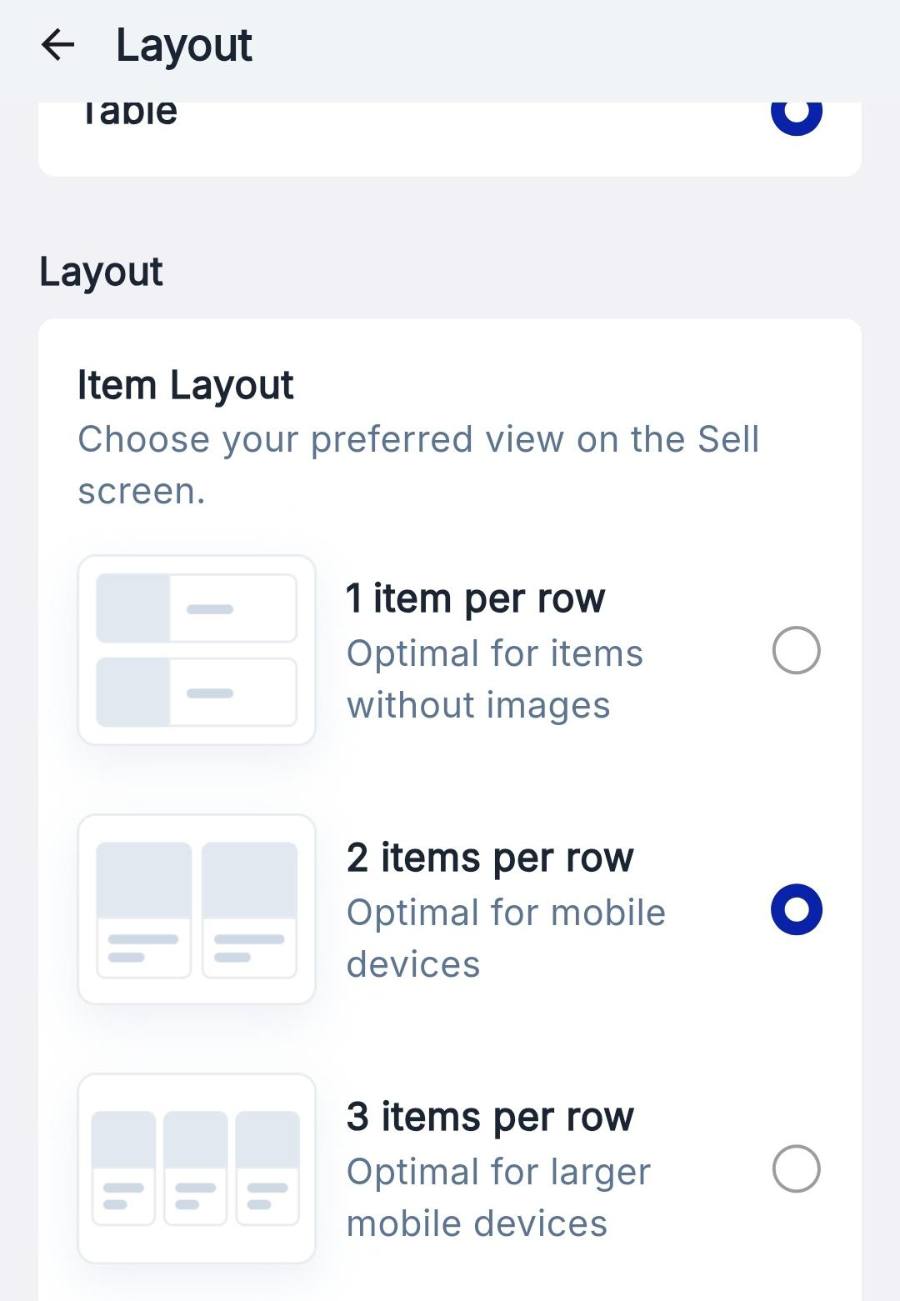
Under Item Layout, choose how many product cards sit in a row.
Show or hide item images
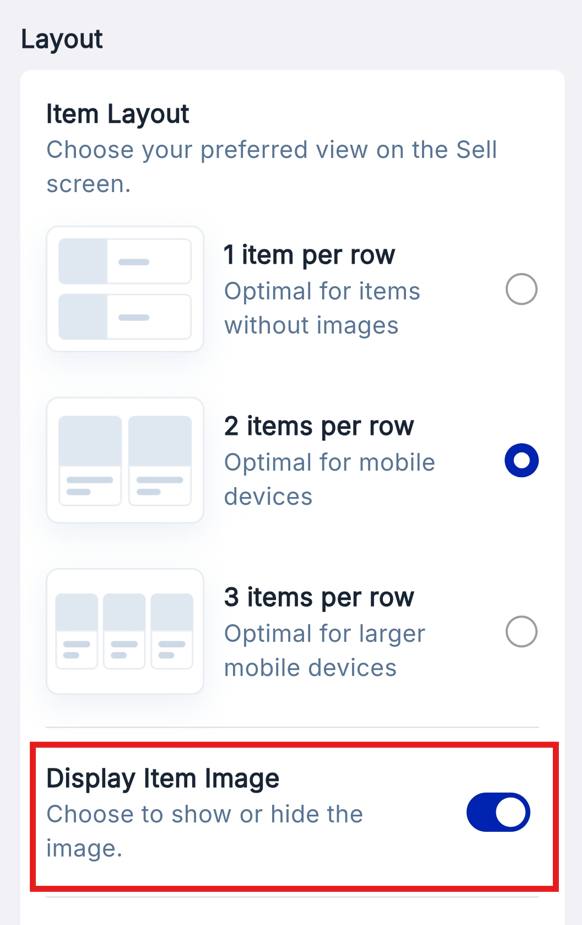
Still in Layout, find the Display Item Image toggle. ON shows photo tiles; OFF gives compact text-only buttons that fit more items on screen.
WATCH IT INSTEAD
Tablet walkthrough
Phone walkthrough
IF IT LOOKS WRONG
The grid snapped back
Edits in Edit Layout only stick when you press Save. Leaving the page first discards them.
Tiles show no photos
Display Item Image is off, or the items have no image yet. Check the toggle in Layout settings first.
Sell opens on the wrong screen
Sell Mode is set per device. Change it on the phone in Settings › Layout.
